
How to carry out a migration of a multi-language domain to Webflow and not lose your mind? How to completely automate the process of implementing copy in a project sprawling across dozens of landing pages?
If you’re facing this challenge, same as we did a couple of months ago, read on. What do we have in store?
- A success story of a client whose domain we migrated to Webflow,
- A description of the migration process and multi-language site automation, both devised by us,
- A step-by-step manual on how to do it yourself.
What made us migrate to the no-code system?
We’ve been cooperating with a client in the field of education for a number of years. Before the migration, we’d been responsible for design, implementation and optimization of landing pages.
The system we’d used for setting up and optimizing landing pages did not entirely meet our expectations when it comes to functionality and was pretty limiting. We were confident though that we could squeeze out much better results out of our landing pages.
However, because of the complexity of the project and the multilingual domain, we needed to wait for the best moment to implement such serious changes and plan the whole process rationally.
Come November 2021, we were informed of an upcoming rebranding, including the website and landing pages. It was the perfect time to kill two birds with one stone - redesigning and moving the site to a new, more efficient system.
System limitations before the migration
Slow page speed
Before the migration, page speed left a lot to be desired. We were positive that improving this will greatly increase the number of conversions on the page.
Low responsivity
Another issue we’d been encountering was introducing changes for different screen resolutions. The mobile versions were especially problematic, where implementing changes proved very time consuming. On top of that, there was a huge possibility of making mistakes, as the process of copying text in about a dozen languages and adjusting most elements was manual.
Insufficient functionality
The system was also limiting the design of the landing pages themselves. Our client is developing their services using cutting edge solutions in the field of education, and we, based in an old system, weren’t able to match that. For instance, we weren’t able to add animations on the site.
Tedious work with many languages
At the time of the migration, we’d been working with landing pages for about 10 countries. Because of the system being poorly fit to our needs, we’d had a hard time adjusting pages to right-to-left languages, like Hebrew or Arabic.
Adding translations for specific language versions was also tedious. Because of the necessity of adding copy in different resolutions, it was easy to miss something (e.g. that the mobile site has a different version of the text). For this reason, it was easy to make a mistake when copying landing pages - like the French copy ending up on the Spanish landing page.
What is more, the landing page content had to be copied from an aggregated spreadsheet, where all the language versions were placed besides one another. This made it even easier to make a mistake.
Why did we go with Webflow?
Before finally settling for Webflow, we tested a number of solutions, like: Unbounce, Landingi.com or GetResponse.
We also took the most obvious choice, Wordpress, into consideration, knowing that it would definitely work great with multi-language sites. Yet even despite this advantage, it still wasn’t enough for our needs. We were looking for a platform that is first and foremost tailored to designers, not web developers.
In the end we decided to go with Webflow, a no-code tool for designing web pages. We believe it offers the widest spectrum of possibilities:
- No-code workflow - this meant we could implement all changes ourselves, without the need to get developers involved,
- A multitude of automation options - integrations with Zapier, Make, etc.
- The option to set up different breakpoints - thanks to this, we could create a fully responsive site for every device,
- Ease of adding animations - crucial for this project,
- Easy-to-access know-how - in the form of a knowledge base on Webflow University and a robust forum.
Planning and carrying out the migration
We’ve mapped the whole process out according to Best CRO Practices. All changes were introduced iteratively: firstly, we designed and implemented the graphical elements in compliance with the new branding, and only then did we proceed with changes in the structure of the page and further landing pages optimizations.
Why this order?
Keeping a sufficiently high conversion rate on the landing pages is of utmost importance to the client. Because the structure of the page had been performing well in this respect, we decided to stick to it - only transferring it to a new system and adjusting it to the new branding.
Step 1. Preparing the projects
We started from designing the landing pages. We had to, among other things, prepare a style guide for a number of breakpoints.

Step 2. Building the structure of landing pages
Then, when the designs were ready, we started building the landing pages’ structure, directly in Webflow. This stage was took a significant amount of time, not only because of the complexity of the project (5 main landing pages for each of the 10 languages and many promotional landing pages) but especially because of how challenging it was.
Challenge: Webflow and multi-language sites
Despite its many advantages, Webflow didn’t support multi-language sites yet. At the time of us working on this migration, the development team planned to tackle this issue in the latter half of that year, and such a long wait was out of the question.
The options the designers had were very limited. We could have designed our own solution, or use an existing plugin - Weglot. It’s an automatic translator with the option to manually edit the translated text.
However, this was an imperfect solution for us - manually correcting the translations in Weglot proved to be too time-consuming. On top of that, the option of automating adding our own translations, provided by native speakers, was key for us.
Another option we considered was to implement specific landing pages in their language folders, but we ultimately decided not to go with this option either. The sheer volume of the data meant that we couldn't automate this process, and content would have to be added manually anyway.
No ready solutions? We created our own!
In order not to waste time and capacity on inefficient ready-made solutions, we decided to risk it and create our own process. To this end, we used CMS Collections, from the Webflow library.
CMS Collections in Webflow is a dynamic repository of our content, which allows us to access the type of content of our choice from any place in the project. It works great e.g. in the case of blog posts - automatically pulling copy into a template created by us.
The first step in working with Webflow was to prepare a draft Styleguide subpage, serving as reference and database for font sizes, images and colors conforming to the new branding for specific breakpoints.

Once the Styleguide was ready, we could set up the first landing page template. After preparing the template we created a dedicated CMS collection that corresponded to text boxes previously designed in Figma. Each text box had it’s equivalent in the collection.
The next step was to create separate collections for each landing page. As Webflow allows us to add no more than 60 elements to each collection, again, we needed to lean on our own, custom solution. We circumvented the system’s shortcomings with a multireference connection that allowed us to link specific collections.
Why was this the best solution?
Because certain sections on each landing page were the same. We could create linked connections for such sections like: FAQ, footer, pricing or testimonials.
Time for full automation
After preparing the landing page template and collections, it was time for our main goal: implementing fully automated downloading and uploading of landing page content. We also wanted our native speakers to have the option of adding content to one, common spreadsheet.
Preparing a spreadsheet - the foundation of automation
We created a spreadsheet which would serve as the source for copying content to relevant collections in CMS Webflow. Each text box on the landing page corresponds to one text box in a collection. In our internal spreadsheet nomenclature, these text boxes were called elements.
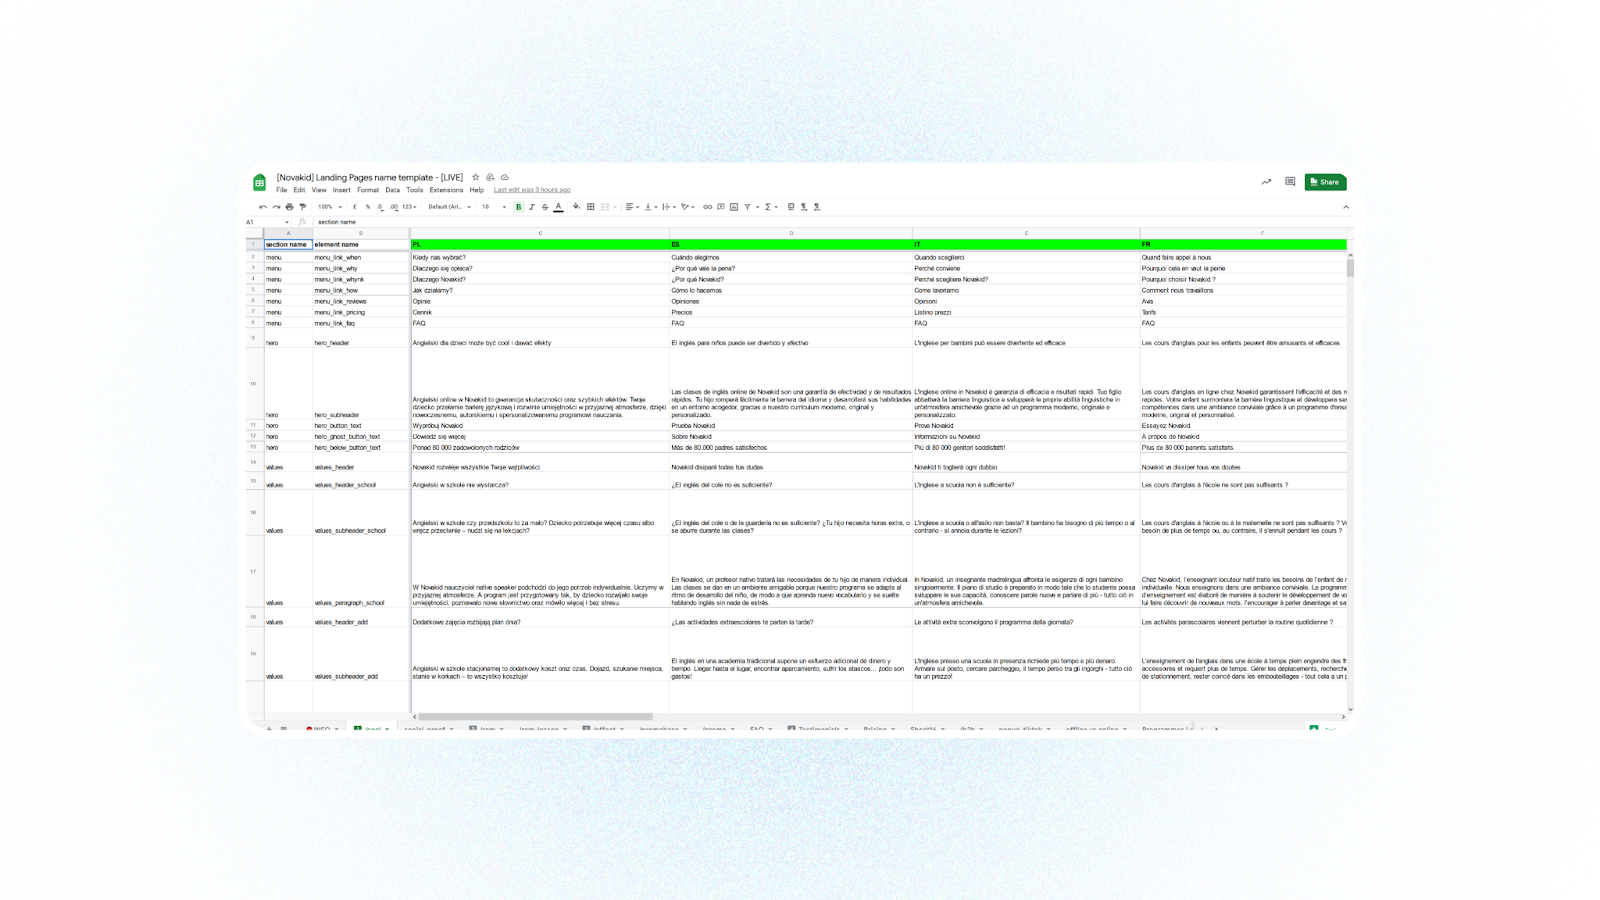
Each element was given a unique name, e.g. hero_header or cta_paragraph. Then, we used the same names in all Webflow Collections dedicated to specific landing pages.
Automatic connection between Webflow and the spreadsheet
To integrate these two elements we used Make (formerly known as Integromat), a platform facilitating the creation of an automated workflow in projects. Using Make we connected the spreadsheet to Airtable and created a new, custom workflow that’s updated daily.
How to reverse-engineer our workflow step-by-step? Download the detailed manual!
Our next step was to integrate automatic content updates in the respective Webflow collections using PowerImporter. This resulted in complete automation of adding and updating the copy elements on landing pages and a complete elimination of mistakes in the process. All the copy added to the spreadsheet is updated once a day, but in case of urgent changes, we can also modify content manually.
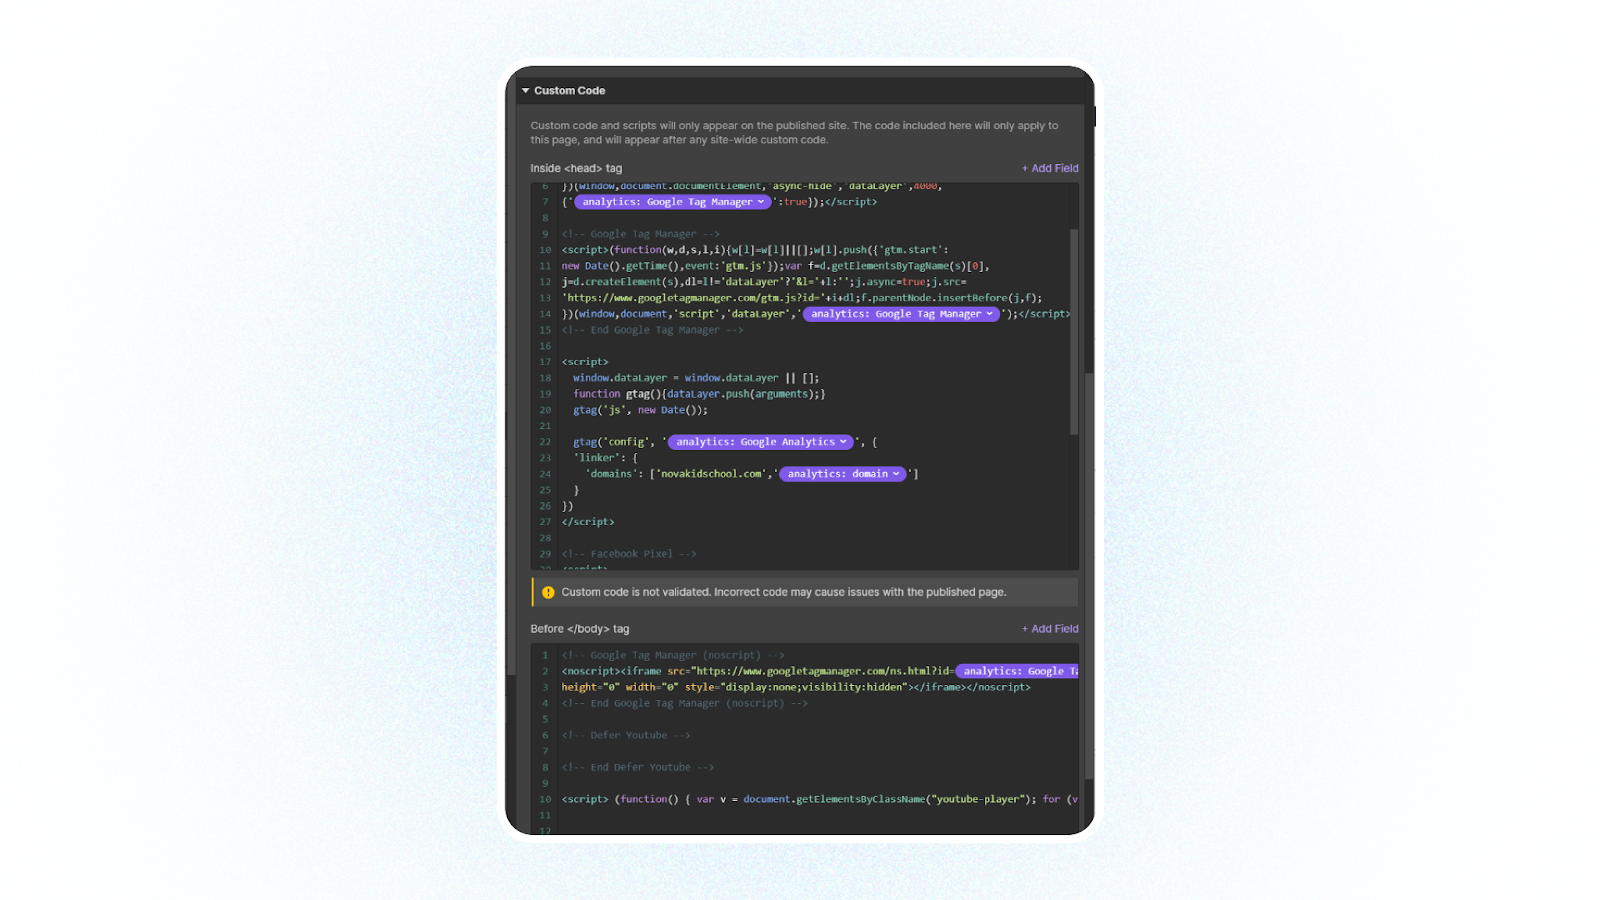
Implementing tracking tags
Last, but not least, we connected analytics. We wanted to integrate data from all countries and all accounts from Google Analytics, Google Tag Manager, Facebook Pixels and other tags. Our client works on two levels of analytics - global and dedicated to specific countries. This is why adding tracking codes in the main preferences of the project wasn’t enough - we also needed to take care of analytics in all the countries separately.
To achieve that, we added a separate Analytics collection in Webflow, where we added text boxes for all the necessary codes, like GA. Then, we implemented them in the settings of each landing page template, additionally making use of dynamic fields so that they are fetched as variables from the correct collections.
If you’re facing a similar challenge of automating a complex project, check out our manual, where we describe, step-by-step, how to:
- connect Airtable with spreadsheets using Make,
- use Powerimporter to connect Airtable with Webflow,
- set-up an automated workflow from start to finish.